


Notes
Please note that this User Guide has gotten somewhat out of date. Please also take a look at the FAQs, which might be more up to date. Also, please don't hesitate to email us at: mail@preside.io with any questions.
Quick Tips
- Shake your phone to undo accidental moves to trash or elsewhere.
- Most fields are horizontally scrollable. If something seems chopped off, try swiping across the item to scroll it.
- Swipe across email previews (in Inbox) for fast delete
- Tap on the body of an email to bring up a toolbar that allows for marking an email unread or flagging it.
- Swipe across the body of an email to move to the next or previous one within the current list.
- Tap on any setting to learn more about it. Use the Help button
 and Info button
  for more details
Contents
- Tab Bar
- Inboxes
- Folders
- Search Emails
- Quick File
- Status
- More
- Compose
- URL Schemes
Tab Bar
Preside is navigated and controlled using the tab-like buttons on the bar at the bottom of the screen. Each of these tabs brings you to a different set of features within Preside. A brief description of each of these tabs follows:
 | The leftmost tab is the Inboxes tab. Tapping on this will bring you to the list of folders that require frequent attention. |
 | The Folders tab is second from the left. It shows all of your folders aside from the ones in the Inboxes tab. These are generally the folders that you do not access as frequently. |
| The next tab over is the Search tab. You can perform full text searches for all of your emails from here. | |
 | The Quick File tab is the next one over. In earlier versions of Preside this was used for batch filing emails from all of your inboxes. That functionality is now available for any folder including the All Inboxes 'smart' folder. As such, the Quick File tab will be removed in future versions of the app. |
 | The Status tab is where you can see all of the activity that Preside is performing in order to download and process your emails. |
 | The tab at the far right is the More tab. That provides access to the various preferences, configuration options, and other helpful tools and information. |
Inboxes
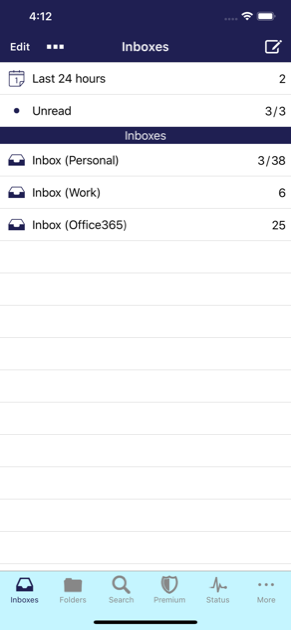
The Inboxes screen shows the folders that you access most frequently. For most users, this means the inbox for each of your mail accounts. If, however, you use server-side rules to pre-filter incoming mail into alternate folders, those folders can be included in this tab too. The other types of folders that appear in this screen are context folders. These are folders that contain emails requiring action that cannot be taken until later. They correspond to 'Contexts' in the GTD ® task management system. See folder settings section below for a more detailed description on the different folder types available.
At the top right of the Inboxes list is the Compose button  . Tap this button to compose a new email. The screen presented is the standard iPhone email composition screen.
At the top left of the Inboxes list is an Edit button. Tapping that button will allow you to reorder the inboxes. After placing the screen into Edit mode, you can move the rows around by tapping, holding, and dragging on the control at the right of the row. Please, note, however, that you cannot move rows between sections. In other words, you cannot drag a Context folder into the Inbox area. Once you have each of the sections ordered the way you desire, tap the Done button to exit the Edit mode.
For each folder or mailbox in the Inboxes list that is not empty, the total messages count  will be displayed on the far right. This number is the total number of messages ready for reading in that folder. If the folder also has unread messages, the unread message count
  will be displayed just to the left of the total message count.
Tapping on the folder or mailbox will bring you to a list of messages for that folder.
Email list
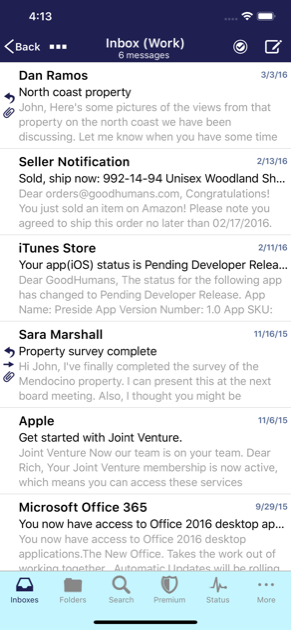
Once you've enterred a mailbox or folders, you will be presented with a list of emails. These emails are ordered with the most recent email at the top and the oldest message at the bottom. It is important to note that the times used for sorting as well as the time displayed in each message synopsis is the time the email was sent (not the received time).
At the top left of the Email List screen is the back button, which you can tap to go back to the previous screen. At the top middle of this screen is the folder's title. The title will occasionally be replaced with a progress bar and messages when the app checks for new messages or performs other maintenance operations on the folder.
Second from the right at the top is the Batch Operations button  . The number within this button is the number of available emails in the folder. Tapping that button will bring you to the Batch Operations screen. That screen can be used to file multiple emails from the current folder at once. It works almost exactly the same as the Quick File screen (described below) except that it only works on the emails in the current folder.
Second from the left at the top is a Menu button  . This button provides access to various operations that can be performed on this folder. The specific operations that can be performed are dependent on the folder being viewed, and these operations generally are things that have consequences for the email account on your server. The list of potential actions from this button is:
- Add sub-folder
- Rename folder
- Compact folder
- Empty trash
- Speak folder
As a matter of convenience, this sheet also provides the ability to quickly start a new email.
The body of the Email List screen contains the emails in this folder. Each email is displayed with the sender in bold at the top.
Next to the sender, a folder name and icon will sometimes appear. This occurs if the mail list being viewed is the result of a search or a 'smart' folder. If the folder name is present, it indicates one the folders that the email resides in. The actions taken on this email will affect the folder displayed.
The last item on the top line is the date and/or time that the email was sent. If the email was sent 'today' only the time will be displayed. If it was sent within the past week, only the day of the week will be displayed. Otherwise the date the email was sent will be displayed.
The next line in the email synopsis is the subject of the email, and that is followed by a preview of the email. The preview will be a little shorter in the ad-supported version of EmailGanizer than the pro version.
Finally, to the left of each email is an area used for displaying meta information about the email. Specifically:
 | a colored ball icon indicates that the email has not yet been read |
 | a curved arrow indicates that the email has already been answered |
 | a right pointing arrow indicates that the email has already been forwarded |
 | a paperclip icon indicates that the email has attachments |
 | a flag icon indicates that the email has been flagged |
There are two user interactions that can be performed on an email from the Email List screen. If you swipe from left to right across the email, you will be presented with a red button that allows you to quickly move the email to the appropriate Trash folder. If you tap on the email, you will be brought to the Email Details screen.
Sometimes there are older emails in the folder that have not been downloaded to your device. When this occurs, there will be a special cell titled 'More Emails' at the bottom of the email list. Tapping on that cell will increase the download limits by 64 for the current folder. This, in turn, will cause the previous (by date) 64 emails to be downloaded and shown in the list.
Email Details

The Email Details screen shows the email headers and body. It is the main screen used for processing emails.
At the top right corner of this screen is the Reply button  . Tapping it will present you with an action sheet with reply choices. These include the ability to reply to all recipients, reply to only the email sender, forward the email, or simply start a new email. Tapping on one of those choices will bring you to the built in iPhone Mail compose screen.
The button second from the right is the Organize button  . This is the single most important button in Preside, as it leads to the auto classification features. Tapping on the Organize button will present you with another action sheet. This action sheet provides you with some folders where the email can be quickly filed. The folders presented are the ones that Preside thinks are the most likely places for the email you are currently viewing. Tapping on one of the folder choices will move the email into the selected folder (both locally and on the server) and dismiss the current screen.
For gmail users, there will also be an gmail Archive choice in this action sheet. Tapping that will perform the Archive function associated with gmail. Another option in this action sheet is the Trash option. Tapping that will move the current email into the Trash folder of the current account and dismiss the current screen. Finally, if the folder you wish to move the email into does not appear in the action sheet, you can tap the More choice to proceed to Folder Suggestions screen. That screen will present several other filing options.
In addition to the standard configuration for the Move Email action sheet, you can also add 'favorites', 'recents', and an 'Inbox' to make those specific folders available for 2-tap filing.
The second button from the left is the Tasks button  . This button allows you to select to copy the email to the iPhone's built in Calendar and/or your task management system. Tapping this button will bring you to yet another action sheet. That action sheet will present you with the option to add information from the email into the iPhone Calendar or one of your tasks accounts.
Preside can add tasks directly to Exchange accounts and Toodledo accounts. By default, Exchange accounts have tasks creation enabled when they are entered into Preside. To use a Toodledo account with Preside, add the account from the More > Accounts area and choose the Toodledo account type when presented with the list of account types. Many task manager apps, including 'Action Lists' integrate with Toodledo. If you have a Toodledo account or Exchange account, there will be an 'Tasks Account' choice on the Tasks action sheet. If this choice is selected, you will be brought to a screen where you can edit the various attributes of the todo list item to be uploaded. The input form on that screen is defaulted to have the subject of the email as the todo item title and the body of the email as the note on the todo item. All of the other fields are retained from the last entry.
If you have other supported applications installed and enabled, these will also be presented. Tapping on one of those application names will start that App and pre-fill the information for adding the item to that app. The supported apps are:

| OmniFocus |

| Appigo Todo |

| Round Tuit |

| Things |

| Toodledo |

| FireTask |

| The Hit List |
The top line of the email itself is the From line. It contains information about the sender of the email. That person's name appears in a button  that can be tapped on. When tapped, that button will bring up an action sheet. The first choice on this sheet allows you to Compose a new email to that person. The second choice is the Contacts choice. This will open the entry in the built in iPhone Contacts database if it exists. If not, it will open a screen where you can create an entry for this person or you can add the email address to an existing entry. The next option on this sheet is to add a new email folder with the same name as the person. The last entry in this action sheet copies the person's email address to the system Pasteboard.
The next few lines in this section show the email's recipients, cc's and bcc's. These will only be displayed if values exist. For each person in these lists, a button will appear and will offer the same options as those described for the From line. It should also be noted that these lists are all horizontally scrollable. To see the recipients that are not visible, scroll to the right by swiping from right to left on the given line.
The next line is the subject line. This contains the subject of the email. If the subject is small enough to fit on two lines, it is displayed in its entirety on those two lines. If the subject is long, it is displayed on 1 line that is horizontally scrollable.
If the email has attachments, a list of them will be displayed in the next section. The name of each attachment will be displayed in a button  that can be tapped on. If the color of that button is lighter and a down arrow appears, the attachment has not yet been downloaded. Tapping on that button will start downloading the attachment. If the attachment is an audio file, the button will be replaced by music player controls once the download is complete. Tapping the play button on these controls will play the given attachment. For non-audio attachments, the button will turn into a darker button
  once the download is complete. Tapping on the black button will display the attachment in the Document Preview screen. That screen, in turn, might offer the option of using another app to view the document. This choice is in the top right corner of the Document Preview, and it is useful for viewing non-standard attachments.
Immediately above the body of the email is the time that the email was sent. On the right side of this line is the html button  . That button is only included on emails that have been formatted using html. It is very useful. Tapping on the html button will display the email with the proper html formatting. This is the way to see images in your email.
In the same area as the html button a thread button  will be displayed if the current email is part of an email thread. Tapping that button will display the thread in its entirety.
The next section in the Email Details screen is the actual body of the email. In this section, Preside inserts links for parts of the email that is recognizes as such. These might include URLs, phone numbers, dates, and locations. Tapping on one of those links performs the expected action.
The final section in the Email Details screen is the Message History section. That section will only appear if there are messages prior to the current email in its same discussion thread. If that is the case all of the prior messages in the discussion will be displayed in a conversation style view. Any of the messages can then be viewed in full detail by tapping on the preview.
In the cases where the message history is displayed, the quoted text from the email is hidden. That quoted text can be revealed by tapping on the down arrow on the left hand size of the Message History header bar. It can be hidden again by tapping the up arrow at the very bottom of the screen.
Move Email
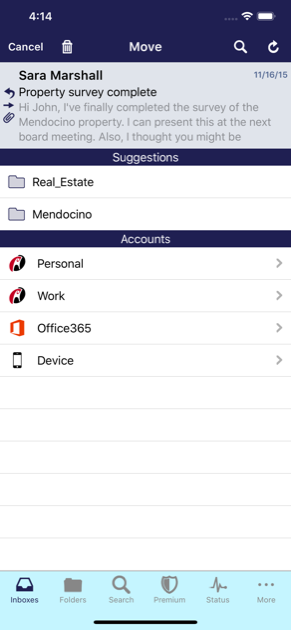
If the More button was tapped when trying to move an email, you land on the Move Email screen. This screen presents some different mechanisms for finding and selecting the folder to move the email into.
In the top right corner of this screen is the Refresh button
 .
Tapping this button will reclassify the email. When the classification is complete, the screen will be updated with an extended list of suggested folders. Since new data might have arrived since the email was last classified, tapping the Refresh button can sometimes result in more accurate suggestions. Included with each refreshed suggestion will be one or more of the terms that caused to Preside select the given folder. This feature helps you to understand how Preside makes its selections. It also can be very useful for finding emails that were previously mis-categorized.
.
Tapping this button will reclassify the email. When the classification is complete, the screen will be updated with an extended list of suggested folders. Since new data might have arrived since the email was last classified, tapping the Refresh button can sometimes result in more accurate suggestions. Included with each refreshed suggestion will be one or more of the terms that caused to Preside select the given folder. This feature helps you to understand how Preside makes its selections. It also can be very useful for finding emails that were previously mis-categorized.
The button second from the left in the Move Email screen is the Search button
 .
Tapping this button will take you to a screen where you can search for folders by the name of the folder. This is often the quickest way to get to the desired destination folder when Preside's suggestions are not correct. Tapping a folder from that screen will move the email to that folder and dismiss both the Move Email and the Email Details screens. Subsequently shaking the phone will offer you the chance to undo the move.
.
Tapping this button will take you to a screen where you can search for folders by the name of the folder. This is often the quickest way to get to the desired destination folder when Preside's suggestions are not correct. Tapping a folder from that screen will move the email to that folder and dismiss both the Move Email and the Email Details screens. Subsequently shaking the phone will offer you the chance to undo the move.
The top section of the Move Email screen displays the list of folder suggestions that Preside has determined might be appropriate for this email. These are presented in order of relevance. Only the first 5 are displayed if the Refresh has not been tapped. Tapping on any of the folders in this section will move the email to that folder and dismiss both the Move Email and the Email Details screens. Subsequently shaking the phone will offer you the chance to undo the move.
The next section of folders displays all of the folders marked as 'Favorites'. Preside automatically sets the Trash folders as favorites, but you can set other folders as favorites using the Folder Settings described above. Tapping on any of the folders in this section will move the email to that folder and dismiss both the Move Email and the Email Details screens. Subsequently shaking the phone will offer you the chance to undo the move.
The next section of folders displays all of that were recently used. This includes both folders that have had emails filed into them as well as newly created folders. The folders with the five most recent of these actions will be displayed. Tapping on any of the folders in this section will move the email to that folder and dismiss both the Move Email and the Email Details screens. Subsequently shaking the phone will offer you the chance to undo the move.
The bottom section of the Move Email screen allows you to browse accounts for the destination folders. This is similar to the builtin iPhone Mail app's filing feature. Tapping one of the accounts in this section will bring you to a screen that lists all of the folders in that account. From there you can select a destination folder for the email.
Html Viewer
The Html viewer is displayed when the html button is tapped while viewing an email or a link within the email is tapped. At the top right of this screen is the Done button. Tapping on that button will dismiss the Html Viewer and return you to the Email Details screen. At the top left of the screen is a back arrow button. This is only visible and enabled if it is possible to go backwards in your web viewing. Tapping that button will invoke bring you to the previous page. Similarly, the second button from the left is the Safari button, which is only visible if the current content can be viewed within the built in Safari web browser. If this button is tapped on, Preside will be exited and the Safari web browser will be launched in order to view the current link.
Threads
The Threads screen is displayed when the Thread button is tapped while viewing an email. At the top left of this screen is the Done button. Tapping on that button will dismiss the Thread screen and return you to the Email Details screen. At the top right of the screen is the Organize button. The button is the key to filing entire email threads at once. It works exactly the same as the Organize button on the Email Details screen, except that it, and any of the sub-screens navigated to from its action sheet, will work on the entire thread. It should be noted that emails within the thread that are already in the desired destination folder, will be ignored.
Email Speech - Powered by iSpeech®
The Email Speech screen is displayed over the Email Details screen while emails are being spoken. Most gestures are disabled when this is occuring, but you can still 'Swipe' to move to the next or previous email. You can also use the tabs. Additionally, there are three buttons that can be used while emails are being spoken. The button on the far left will play the previous email, and then continue playing in that same direction. The button on the far right will play the next email and continue playing in that direction. The Pause button in the middle will stop the emails speech and return to the Email Details screen. If none of the buttons are pressed and the email is spoken to completion, it will automatically continue to play the next (or previous) email.
Folders

The Folders screen shows all of the your email folders that are not Inboxes, Lists, or Context folders. These will mostly be your Reference folders, but it also includes Trash, Sent, and Drafts.
At the top right of the Folder List screen is an Edit button  .
Tapping that button will put the folder list into Edit mode. In this mode, all folders will be displayed, including ones that were previously hidden, as well as Inboxes. Additionally, there will be a single row for each Account at the top of the list of folders for each account. The folders can be rearranged by tapping the control at the right of the folder row and dragging the folder to a new place in the hierarchy. As you drag the folder, over other folders, the drop destination will be highlighted. Folders cannot be moved within the same level or to different accounts and only legitimate drop destinations will be highlighted. Unlike the Inboxes list, folders moved on this screen will actually be reflected on the email server and for all email readers that access the account.
.
Tapping that button will put the folder list into Edit mode. In this mode, all folders will be displayed, including ones that were previously hidden, as well as Inboxes. Additionally, there will be a single row for each Account at the top of the list of folders for each account. The folders can be rearranged by tapping the control at the right of the folder row and dragging the folder to a new place in the hierarchy. As you drag the folder, over other folders, the drop destination will be highlighted. Folders cannot be moved within the same level or to different accounts and only legitimate drop destinations will be highlighted. Unlike the Inboxes list, folders moved on this screen will actually be reflected on the email server and for all email readers that access the account.
Tapping on the red circle on the left of the folder list, while in Edit mode, will present a 'Move to Trash' button that can be used to move the folder to the Trash. This is also a function that will occur on the server. The trash would still need to be emptied to completely delete the folder. As with almost every operation in Preside, both folder moves and deletes and be undone by shaking your phone and tapping the 'Undo...' button. To exit Edit Mode, tap the Done button at the top right.
Second from right at the top of the Folder List screen is a Add button  . This button can be used to add a new folder both locally and on the server. The initial values for the New Folder screen are based on your current position in the folder list.
At the top center of the Folder List screen is a search box. Tapping this box will bring you to the Folder Search screen. That screen will allow you to very quickly navigate into folders by searching for them instead of browsing.
Second from the left at of the Folder List screen is a Menu button . That button presents an action sheet that lets you expand, collapse all of the folders in the hierarchy below. The top choice on that sheet refreshes the folder list. This is useful when you've made changes to your folder hierarchy using another email reader and Preside has not yet automatically incorporated those changes.
At the top left of the Folder List screen is the bookmarks button. Tapping that button will bring up the Favorites List screen, which allows you to very quickly navigate to your favorite folders.
At the top of the main section of Folder List is a yellow bar that displays your current location in the folder hierarchy. This is useful as you scroll down and your top level folders disappear from the screen.
The main part of the Folder List displays your mail folders. You can scroll through this list by swiping from bottom to top. Tapping on a folder will bring you to the Email List which will display the emails in the tapped folder.
To the left of each folder on the main part of the screen is an arrow that will expand the folder to show its sub-folders or collapse the folder to hide its sub-folder. This arrow will not appear if the Folder Navigation Style preference is set to 'List'
In that case, the righthand side of the Folder List is a table index that allows you to quickly navigate to different portions of the folder list without having to perform lots of scrolling gestures. Simply tapping on one of these box-like characters will scroll the folder list by some percent of the rows in the list.
New Folder
The New Folder screen allows you to add a new folder to your IMAP account. To create the new folder, you should enter a name for the folder on the top line. Tapping on the next line allows you to choose an account in which to add the folder, and the third line lets you choose the parent folder underneath which to add this new folder. Tapping the Save at the top right will add the folder, while tapping the Cancel button  will dismiss the current screen without creating the new folder.
Folder Settings
The Folder Settings screen allows to you configure special behavior for a particular folder. For the most part, these settings can be left alone, but sometimes it can be helpful to change them in order to get Preside working just the way you like. Each setting is listed below along with a description of that setting.
- Account is the account that the folder belongs to. This is not editable.
- Downloaded is the number of emails that have been downloaded and trained. The second number is the total number of emails available on the server. In a typical installation, only a portion of the emails in larger folders will be downloaded. More details about this are provided below. This particular row is not editable.
-
Folder type tells Preside how to treat this folder. This includes where the folder should be displayed, how to train the emails in the folder, and various other default properties of the folder. Tapping this row will bring you to a screen where you can select the correct type for this folder.The different folder types are:
 Inbox is something you are most likely familiar with from other mail readers. It is the main place where you receive incoming messages.
 Sent is a folder that stores messages you have sent. This is similar to other email clients, but those other clients often each use a different folder for this purpose. Preside marks any folder it thinks is a container for sent messages as being this type. This might cause you to have a few different Sent folders for Preside's purposes. When looking for sent messages, all of these should be examined (since your other email clients might have used them).
 Trash is a standard Trash folder. Like the Sent folders Preside might consider more than one folder as a Trash folder. For the purposes of moving an email into the Trash, Preside uses the first Trash folder it finds for each account.
 Reference folders are where you store the emails that you are done with. Most of your folders are considered reference folders.
 Drafts is a folder that stores draft messages you have started but not yet sent. This is similar to other email clients, but those other clients often each use a different folder for this purpose. Preside marks any folder it thinks is a container for draft messages as being this type. This might cause you to have a few different Draft folders for Preside's purposes. When looking for draft messages, all of these should be examined (since your other email clients might have used them).
 Junk is your spam folder. For a properly administered enterprise-grade email account, this folder should always be empty.
 Context is a folder that corresponds to an @-style context used in GTD and other task management systems. It contains emails that still require some action, but they have already been mostly processed and should not be clogging up your inbox. A folder called @Waiting might be used for emails that are awaiting a response or other action before they can be filed away into a reference folder.
 Hidden folders are ignored by Preside. It can be very useful to set folders to be Hidden to help your folder list become more presentable within Preside. It should be noted that Hidden folders do not hide their subfolders. Those would need to be each invidually hidden if that is what is desired.
 List is a folder that is a presorted Inbox. It generally contains emails that you have not yet read, but the emails have already been categorized by a server side filtering system.
Namespace is a folder that isn't really a folder at all. Preside treats these the same as hidden folders.
 Repository contains emails that have no relation to each other. This is usually used for 'All Mail', but any folder can be specified to be a Repository. If you just want to make emails available for searching without worrying about categorization, this is where they go.
 Deferred folders hold snoozed emails until they are awakened and moved back into your Inbox. You'll need one of these for each account from which you would like to 'Defer' emails.
- Favorite indicates whether or not the folder is part of the Favorites list. Favorite folders are more easily accessible for filing than non-favorites. They can also be included in the 'Move email' action sheet.
- Training limit is the maximum number of emails that should be used for training this folder for classification. It is generally best to leave this at the Default setting, but changing this setting can sometimes help with classification problems for folders that have many emails from many different sources.
- Classify Emails tells Preside when it should classify emails for this particular folder. In general, Inbox folders have emails classified immediately, while other folders classify emails when the email is viewed.
- Days to sync is a only available for Exchange and Hotmail accounts. It limits the number of previous days' emails that will be downloaded for this folder. Due to the particulars of the Exchange Activesync protocol, this is the only good way to limit the number of emails downloaded from Exchange/Hotmail accounts. The default is to use the setting for the account. The different options for this setting are self-explanatory with the exception of the 'Auto' value. If set to 'Auto', eMaiLGanizer will automatically set the days to sync to 1 month if possible given the value of the Historical limit setting and the content of the folder. If that does not provide enough data for the folder, the 'Unlimited' sync days will be used.
- Soft deletes is a only available for Exchange and Hotmail accounts. It is also only present if the 'Days to sync' option is not set to Unlimited. This option tells Preside how to respond to so-called 'Soft delete' actions from the Exchange server. These are messages indicating which emails are older than the days to sync. If this option is enabled, Preside will remove these messages from its local store. Otherwise, Preside will retain these older messages so they can be searched, used for classifications, and otherwise acted upon.
- Historical limit is the maximum number of emails that should be downloaded during the initial synchronization phase for this account.
- Total limit is the maximum number of emails that Preside should store for this folder. Preside will remove the oldest emails from its local storage in order to keep below this limit.
- Reset allows you to reset all of the contents of the folder. It will delete all information that is locally stored for this folder and its contents. This will cause all of the emails to be re-downloaded and possibly retrained. It also resets the 'Historical' time so that older emails are removed for bigger folders. This operation can be helpful in fixing a wide variety of issues that might arise if a folder gets very big. Resetting a folder can take a while, so please be patient.
Search Emails
The search screen allows you to perform off-line searches of your emails. When you first start typing into the search bar, Preside will auto-search through the contacts in your emails and display any matching email names or addresses. Tapping on one of those items will show you all of the emails from that person. Alternatively, you can type one or more keywords and tap Search on the keyboard. This will perform a full-text search of all of your emails for the keywords enterred.
Quick File
The Quick File tab allows you to file several emails at the same time. On the main section of the screen is a list of emails along with the best scoring folder for each of those emails. For each email that you would like to file to the selected folder, tap the row of that email. The empty circle will become filled with a checkmark. Tap the Save button at the top right of the screen in order to perform the filing. For emails that do not have the correct folder chosen, you can tap on that folder to navigate to the Move Email screen and file the email immediately using that mechanism.
Second from the right at the top of the Quick File screen is the Hide Folders button. Tapping that button will hide all of the folders in the main section and, instead, allow you to file all of the checked emails into a single folder or move them all to the trash. Once the Hide Folders button is tapped on, it will be replaced by the Show Folders button that allows you to return to the normal quick filing mode. Additionally, the Save button will be replaced while the folders are hidden with the Organize button. Tapping the Organize button will bring up the same action sheet as the one on the email Details screen. You can then very quickly file all of the checked emails into the suggested folders or navigate to folders in the same way that is done when filing a single email.
At the top left of the Quick File screen is the Refresh button. This button can be used to re-classify the emails in all of the inboxes. This also restores the classifications that might have been previously removed using the Reset Classifications choice on the action sheet.
Second from the left at the top left of the Quick File screen is an action button. Tapping on that button will bring up an action sheet whose first choice allows you to quickly clear all of your check marks. The second choice on that action sheet will reset all of your classifications. This will remove everything from the quick file screen and these emails will not be classified again until they are viewed (or the Refresh button is used to restore them).
Status
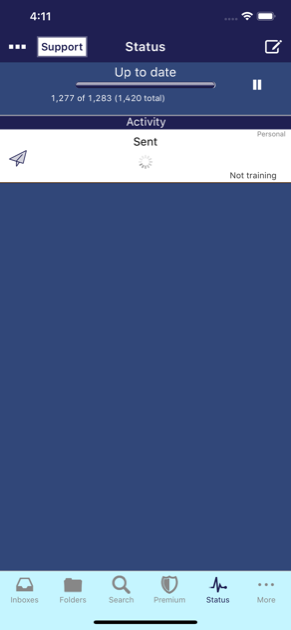
The Status screen provides information about Preside's synchronization status. One of the most important pieces of information it provides is done through a badge (a number in a red circle) on the Status tab button, itself. The number on that badge is the number of pending synchronization actions that Preside has in its queue. As Preside performs actions on the server such as moving emails or marking emails as having been read, this number will decrease until it disappears when there are no more pending actions. If Preside is exited while there are pending actions, the badge will be displayed on the application icon. Preside will try its hardest to complete these actions even after it is exited, but if network connectivity is lost for a long period of time, you will need to restart Preside when connectivity is restored in order to complete the pending synchronization actions.
At the top of the Status screen is a progress bar, along with the status message above the progress bar. The different status messages are:
- Not configured means that no accounts have been entered and there is nothing for Preside to do.
- Configuration in process is shown when Preside is in its initial setup phase. This the phase in which you are enterring your account information, but the initial synchronization has not happened yet.
- Processing headers means that Preside has begun the initial synchronization and it is processing the message headers. Processing includes retrieving the message counts,downloading the headers and training them.
- Processing emails is the phase where the actual content of the messages is downloaded and trained.
- Up to date is displayed when Preside has downloaded all of the emails that it plans on downloading.
- Catching up is displayed when the app is downloading and training all of the emails received since the last synchronization.
The numbers below the progress bar provide information about how many emails Preside has downloaded and the number it plans to download. Due to the way in which Preside downloads emails separate from the headers and the training, this number is more of a progress indicator than an exact representation of emails downloaded. For instance, after Preside has downloaded and trained all of the headers, the progress will be about half-complete even though most of email bodies have not been downloaded.
The final number on that line is the total number of emails available on the server. This number is exact.
To the right of the progress is the Pause button. Tapping this button will pause Preside synchronization activities, and replace the Pause with a Play button that can be used to start it again. Please note that there might be a delay while Preside pauses its various operations.
The bottom section on the Status screen is the Activity section. This section shows the various things the Preside is doing. Most of the information in this section is about folders and operations on those folders. As Preside processes a folder, a cell containing information about that folder will appear in the Activity Section.
In addition to the name of the folder and its icon there are two message sections for the folder. At the left of the row are two numbers of the form, 'n of n'. These numbers represents the total download progress of the folder. The progress bar, itself, also shows the absolute synchronization status of the folder. The two numbers in the same form on the right side show the progress of the current sycnchronization operation. These will usually be accompanied by a message describing that operation.
The main area of the Status screen also shows activity outside of what it ocurring on specific folders. This includes account activity, maintanence activity, and pending actions. The row for pending actions will be displayed when there is a red badge on the tab icon. Tapping that row will bring you to a screen that lists each action that Preside will be performing on the server when available. This screen can be very useful for the cases where the badge on the status icon will not go away for some reason. Tapping Edit at the top right of the Pending Actions screen will allow you to cancel some pending actions if you are confronted with this issue.
More
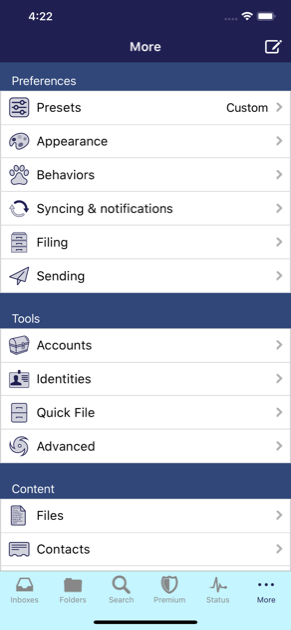
The More screen provides access to several other Preside features and settings. The top section of the More screen shows the current presets that have been loaded. 'Presets' are groups of settings that have been preconfigured or saved. If you've loaded a preset group, the name of that group will be displayed on this line. Otherwise, this line will show the word, 'Custom'. Tapping on this row will bring you to the Presets screen where you can save and load groups of settings.
The next section of the More screen provides access to the various preferences within Preside. The preferences are grouped into different screens depending upon functionality.
The next section of the More screen provides access to tools for changing application settings, viewing status information, and performing maintenance. The most important of these is the Accounts section where you can enter new email and tasks accounts.
The next section of the More screen is the feedback section. Within this section are links you can use to provide us with feedback about the app. If you experience any problems at all with our app, please contact us using one of those links. We pride ourselves on our support and we will try our best to resolve any issue you encounter. If you have purchase the Pro version of the app and are not completely satisfied, we will provide you with a full refund. We can only do that if you contact us, however.
The next section of the More screen provides access to the documentation, including this user guide. There is also an additional Support link you can use to email us any questions you might have.
The last section of the More screen can be used to help us promote the app. It contains links for sharing the app.
Presets
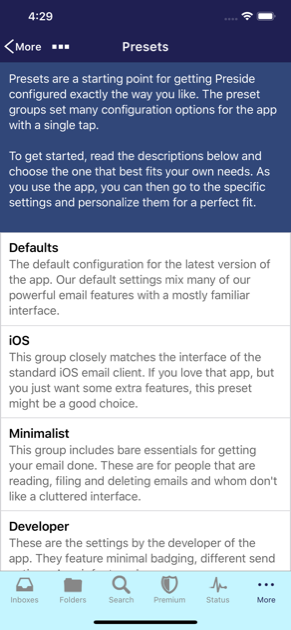
The Presets screen allows you to save and load groups of settings. This makes the process of configuring the app significantly easier than going through all of the individual settings. The best process to follow is one whereby a presets group is loaded and then a small number of individual settings are customized.
System
The presets groups listed in this section are those that are shipped with the app. These are some standard configurations that can make the app more comfortable to people used to some different ways of managing their email.
Recent
The entries listed in the Recent section are those configurations that you've saved for yourself in this instance of the app. Their inclusion on this screen makes them available for quick access.
Files
The 3rd section on the Presets screen is the Files section. This section presents your list of accounts that support files. It also shows your iCloud space and the local device as choices. Tapping on one of these rows presents the appropriate file system and allows you to load settings from a previously saved file.
Appearance Preferences
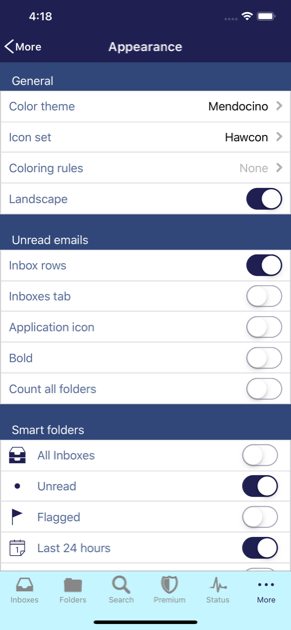
The Appearance Preferences screen is where you can configure the preferences that mostly affect the appearance of the app. At the top right of the screen is the Done button. Tapping that button will dismiss the screen. In general, the preferences are changed immediately when the value if changed, so tapping the Done is not necessary for saving the changes. The various appearance preferences are listed below.
General
- Color Theme allows you to set the colors Preside uses. After tapping on this row, you will presented with a list of buttons. Tapping each button immediately changes the colors to the one selected.
- Landscape enables landscape mode when the device is rotated. For users that like the bigger keyboard when typing emails, this can be very useful.
Unread email count
-
Inbox rows controls whether the unread email count for a folder is shown next to each folder when viewing the Inboxes screen
- Inboxes tab controls whether the total number of unread emails for all accounts is shown in a badge on the Inboxes icon at the bottom left.
- Application Icon displays the total number of unread emails for all accounts in a red badge on the application icon when Preside is not running.
- Count all folders tells Preside to include all folders when calculating the total number of unread emails for all account. If this is set to Off, only those folders (Inboxes, Lists, & Context) that usually appear in the Inboxes screen will be included in this count.
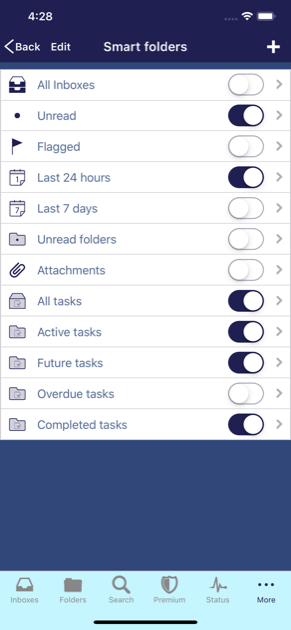 Smart Folders
Smart folders are folders that group together emails from different email folders based on specific attributes of the email. Each folder turned 'On' below will appear on the Inboxes screen.
- All Inboxes combines all of the emails from all of your Inboxes.
- Unread Emails contains only emails that have not yet been read. As you read the emails in this folder, they will disappear from the folder
- Flagged Emails contains only those emails that have been marked as 'Flagged'.
- Last 24 hours contains all of the emails that were sent within the last 24 hours. Even if not used all of the time, it can be useful tool to turn this on temporarily when searching for hard to find emails.
- Last 7 days contains all of the emails that were sent within the last 7 days
- Unread folders is different from the other smart folders. Setting it to 'On' will cause any folder with unread emails to be displayed in a section at the bottom of the Inboxes screen. This is an extremely useful tool, especially for users of server-side filtering.
This section provides access to the low level configuration of the app's appearance. The Layout choice allows you to configure which buttons appear on which screens, and the Fonts choice allows you to configure the font family, style, and size for many of the ui components in the app.
Layout
The Layout screen is where you can configure various layout options for different components of the app.
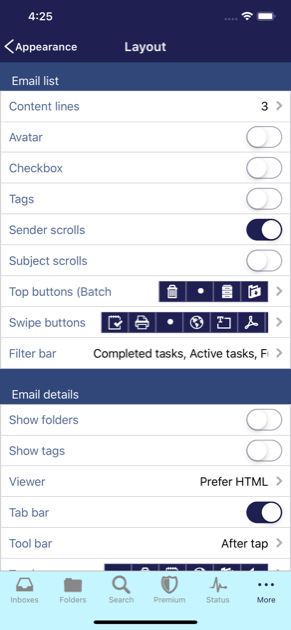
Email lists
Email lists are the lists of emails that appear at various places in the app. Usually, these lists are displayed when viewing your Inbox and other folders. The settings below determine how these lists of emails will be presented.
- Preview lines sets the number of lines of the email that will be displayed when viewing your Inbox and other email folders. A larger number will allow you to see more of the email without tapping on it and possibly allow you to work faster without having to actually visit many emails. A smaller number of lines will allow more items to fit on a single screen.
- Show avatar determines whether an icon representing the sender of the email will be displayed on the left side of the email preview. The image displayed is obtained from the iOS address book and/or other contacts accounts that have been added to the app.
-
Show checkbox determines whether the app will be automatically placed in 'Batch mode' when Inboxes and folders are displayed. This alleviates the need to tap on the Batch operations button
 before performing batch operations. That can save some time for users who often process multiple emails at once.
- Show tags determines whether or not tags (also known as Exchange Categories or IMAP Keywords) are displayed at the top of email previews. If you tag emails, you'll probably want to enable this option.
- Sender scrolls determines whether the sender line in the preview will be horizontally scrollable. When enabled, this allows you to swipe across the sender to see the entire name. On the other hand, this can sometimes interfere swipe gestures, especially if only 1 or 0 Preview lines are configured.
- Subject scrolls determines whether the subject line in the preview will be horizontally scrollable. This can interfere (more so than the sender line) with swipe gestures. Those gesture needs to be performed across the content portion of the preview if this setting is on.
Email details
- Show folders causes the app to display the folders in which an email resides on the Email Details screen. If this preference is on, each of the folders in which the email (or an exact copy of it) is in. The first folder in the list is always the current folder. It is from that folder that will be affected if any operations are performed on the email. The other folders in the list are where the email has already been files or copied to. Setting this to 'On' is very useful for gmail users that add multiple labels to an email. This information appears with the other email headers and is collapsed or expanded with those headers.
- Viewer controls whether the app will display Text or HTML as the default when emails are initially presented to the user. For most power users. the 'Text' choice is recommended for maximum productivity and efficiency. If you receive many HTML emails that actually need to be viewed, the 'Prefer HTML' choice is a good option. That will show HTTML if it is available and it will show the Text version of the email if there is no HTML to display. The 'Force HTML' choice should generally not be used. That will convert text-only emails to HTML for viewing in the app.
-
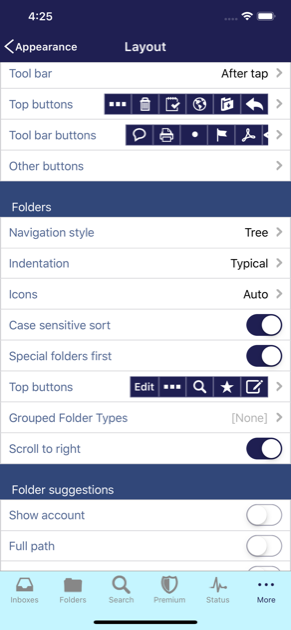
Tool bar determines when the Tool Bar will be displayed on the Email Details screen. The Tool bar is a bar near the bottom of the screen that provides as many email actions as you need. Usually, you would configure your less frequently used actions to appear on the Tool bar. The available settings are:
- When tapped displays the Tool bar after you tap on the email. You can tap anywhere that won't conflict with another tap, but, for best results, try to tap on the line between the headers and the top of the email body. Tap again to dismiss the Tool bar.
- On view shows the Tool bar immediately when you first navigate to an email. If you dismiss it, would can bring it back by tapping in the same way as the 'When tapped' option.
- Always will always show the Tool bar on the Email Details screen. This can be useful if you have lots of common actions you take on email or you just like to keep the Top bar clean.
- Tab bar determines whether the bottom tab bar will be displayed while vieiwing emails. Set this to Off to cause this bar to be hidden while viewing the email..
- Navigation bar buttons presents a screen where you can choose the buttons that will appear on the top navigation bar of the Email Details screen. If more than three buttons are selected then the subject will not be displayed in that top bar. The subject will still be viewable the content portion of the screen.
- Tool bar buttons presents a screen where you can choose the buttons that will appear on the tool bar that is presented when the body of an email is tapped Email Details screen.
- Other buttons presents a screen where you can choose the textual buttons that will appear towards the top of the body of an email. These include the 'HTML', 'Thread', and the 'Text' buttons. These buttons were standard in older version of the app, but they have been superceded by graphical buttons in more recent version. That being said, they are still available for people trying to fit more 1-tap actions on the email details screen.
 Folders
- Navigation style sets the appearance and controls of the Folders screen. If this is set to 'Tree', the Folders screen will display the folders as a hierarchical list with arrows that allow for the expansion and collapse of sub-folders. This is similar to most desktop email readers. If this is set to 'List', the folders will be shown in a format similar to the built in iPhone email reader. Generally, the 'List' option is useful for users with less folders, while the 'Tree' option is better for users with more folders.
- Indentation sets the size of the indentation used on the Folders screen. The 'Typical' option generally looks the best, but the smaller options can be used in order to fit deeper hierarchies on to the screen without needing to horizontally scroll the folders. The 'Auto' adjusts the indentation based on how many levels of hierarchy are current open. As you expand deeper into the hierarchy, the indentation will shrink.
- Icon height sets the height of the icons on the Folders screen. Smaller heights allow more folders to fit on a single screen.
- Case sensitive sort tells Preside to take case into account when alphabetically sorting folders on the folders screen. When this is on, upper-case folder names will appear before lower case name. Otherwise, case will be ignored and upper and lower case folder names will be mixed together.
- Special folders first tells Preside to put special folders like, 'Sent' and 'Drafts' at the top of the Folders screen. When this is off, those folders will be mixed in with the other folders alphabetically.
- Long folder names determines how Preside will display folder names that don't fully fit on the Folders screen when that screen is initially loaded. Setting this properly allows you to see the important part of your folder names without always having to horizontally scroll. If you tend to name folders so that the end of the folder name is the most unique part, choose 'Show end'. Otherwise, choose 'Show beginning'.
-
Grouped folder types allows you to set up folders that contain all of the folders of a specific folder type. These word similar to how your special folders work in a desktop email client. For instance, if you'd like to see all of your Inboxes from all of your accounts in a single parent folder at the top of your folder list, you would enable Inboxes as one of your Grouped folder types. That "Inboxes" folder would then appear at the top of your Folders screen. Selecting that folder would show all of the emails for all of your Inboxes in all of your accounts, while expanding that folder would provide access to the individual Inboxes.
Please note that this functionality can be replicated using 'Smart Folders' and selecting "Folder types" as the criteria.
- Top buttons in the Folders section configures the buttons to appear at the top of Folders screen. Usually, the defaults should sufice for this screen, but, if you don't use Favorites and/or some of the other functionality, you can configure a slighly cleaner interface at the top of this screen.
Folder suggestions
- Show account displays the account for each folder suggestion above and to the right of the folder name. This can be very useful for users with folders in many accounts. If disabled, Preside will still try to uniquify similar folder names in different accounts, but enabling this option removes all ambguity.
- Full path will show the entire hierarchy for each folder in the Folder Suggestions screen. If this is disabled, Preside will still try and uniquify the folder suggestions, but, for some people the full path can lead to less confusion.
- Show terms tells Preside to highlight and display the matching folder terms for email classifications where appropriate. Normally, these are only shown when the Refresh button is tapped on the Move Email screen.
Incoming folders
-
Unread count causes the unread email count for a folder to be displayed for each folder on the Inboxes screen. This setting is also available from the main Appearance Preferences screen.
-
Total count causes the total number of emails for a folder to be displayed for each folder on the Inboxes screen.
- Full path will show the entire hierarchy for each folder on the Inboxes screen.
- Sections determines how folders will be grouped on the Inboxes screen. You can group them all into a singe section or you can split them up into sections based on the different types of folders, therein.
- Folder types specifies the type of folders you would like displayed on the Inboxes screen.
Search
- Search bar determines the types of searchs that are available on the search screen. The selected types will appear in a bar near the top of the screen. Tapping on one of the segments in the bar, will switch the search to the appropriate type.
- Preview lines sets the number of lines of email content that will appear beneath the sender and subject in search results. A different setting is used for search results than other mail lists in order that you can see highlighted matching terms in search results even if you prefer little or no content when viewing a regular folder. Use a larger number to see more matching terms in the result and a smaller number to see less.
Status reporting
- Location describes where the app should locate the messages that inform you about the syncing progress within the various screens. After tapping this row, the screen presented will provide various choices and display an example progress message for each of those choices. There are options that include various positions from the very bottom of the screen to the very top. There are pros & cons to each of the options and it is a matter of personal preference as to which you choose.
- Verbosity controls the amount of feedback about the syncing process that the app will generate status messages for. Most users should leave this at the 'Typical' setting.
- Activity animation can be used to animate the icon on the Status tab whenever Preside is performing background operations.
- iOS Activity Indicator determines whether or not the app will show the iOS activity indicator in the status bar at the top of the screen when it is performing syncing activities.
Fonts
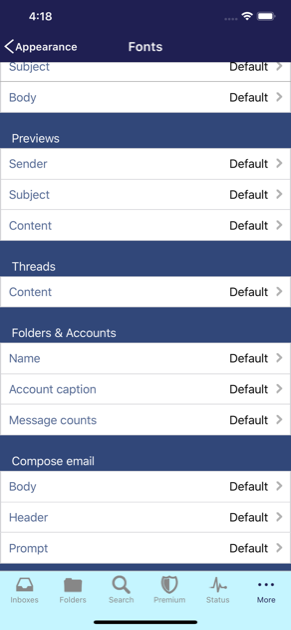
The Fonts screen is where you configure the fonts used for various text components of the app. At the top right of the screen is the Done button. Tapping that button will dismiss the screen. The fonts for each component have 3 components that are displayed on this screen. These are the font family, the font size, and the font style. The various text components for which fonts can be set are listed below.
Email details
- Subject font is the font that will be used for the subject line when displaying an email. Tapping on this line will present a screen that allows for choosing the font family, size, and style.
- Body font is the font that will be used for the body of an email when it is displayed. Tapping on this line will present a screen that allows for choosing the font family, size, and style.
Email previews
- Sender font is the font that will be used for the sender line when displaying an email in a list. This is the top line of the email preview.
- Subject font is the font that will be used for the subject line when displaying an email in a list. This is the second line of the email preview.
- Content font is the font that will be used for the content portion of an email preview.
Threads
- Content is the font that will be used for the content that is displayed in the thread bubble when looking at emails threads or message history.
Folders & Accounts
Behaviors
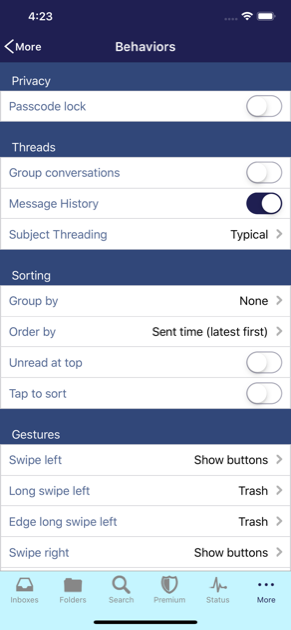
The Behaviors screen is where you can configure the preferences that mostly affect the functionality and features of the app. At the top right of the screen is the Done button. Tapping that button will dismiss the screen. In general, the preferences are changed immediately when the value if changed, so tapping the Done is not necessary for saving the changes. The various behavior preferences are listed below.
Privacy
- Passcode lock turns on security for accessing Preside. If set to 'On', you will be asked to enter a 4-digit code and then to confirm that code. Once set, you will be prompted to enter this security code any time Preside is opened. No email will be visible until you enter the code.
- Recover passcode allows you to use the password from one of your email accounts to authorize access to Preside in the case where you have forgotten your passcode. If this is set to 'Off', you will be unable to use Preside if you have forgotten your passcode. In that case, you will need to delete and then reinstall the app in order to get going again.
Threads
-
Group email in folders is similar to the 'Organize by thread' option in the built in iPhone email reader. If set to 'On', only one email from each thread will be displayed on the Email List screens. Multiple emails within a thread are indicated by the number of those emails in a yellow sphere in the email preview.
- Message History controls the visibility of the Message History feature on Email Details screen. If this preferrence is set to off, quoted text will always be displayed and no message history will ever appear.
- Subject Threading determines how Preside will deduce email threads if only the Subject of the email is available. If set to off, the subject will never be used for threading. The other settings are used to limit the time interval required for messages with the same subject to be considered part of the same discussion thread.
Sorting
- Order by is the field that determines the order of the emails when they appear in an Inbox or folder. This defaults to the time the email was sent, but it also allows for ordering by the email's sender or the subject of the email.
- Reverse determines whether the emails will be displayed in reverse (descending) order. To sort emails from top to bottom in the order in which they were sent, leave this setting off.
- Unread at top causes any email that is marked as unread to be shown at the top of the list of emails, regardless of the other sorting options.
- Tap to sort enables the ability to quickly change the sorting within a folder by tapping on the field (on the top row) that the emails should ordered by. This preference also enables an indicator on the top row of the Inbox of folder that shows which field is being used for ordering the emails and the direction they are ordered in. Only tapping on the fields on the top row will have an affect.
 Synchronization
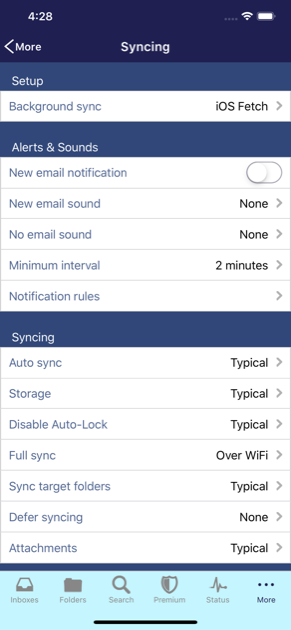
- Auto sync controls Preside's periodic syncing. When turned on, Preside will sync your folders in the periodically in order that your folders are kept up to date with the latest changes on the server. If Auto sync is turned off, folders will be synchronized as you visit them. It is generally best to leave Auto sync turned on. Preside is intelligent about which folders it syncs and when.
- Storage controls the amount of disk space Preside will use on your device. The value chosen here is used for any folder that has its various settings (as described above) set to Default.
- Full sync determines when Preside will synchronize folders that are not expected to have new mail. Unlike other mail readers that can wait until you visit a folder to catch up, Preside needs to train itself with your latest filings made from your other mail clients. This setting tells Preside when to do that. For Rackspace Mail and other advanced IMAP servers that support the LIST-STATUS command, this setting is unnecessary and, therefore ignored. Otherwise, if you have an unlimited data plan, you can set this value to 'Any time', and if you pay for you data, you should leave this at 'Over WiFi'.
-
Sync target folders describes how Preside should handle the automatic syncing of folders after emails are moved into them. Getting this correct is not essential to the app's functionality, but it can be used to optimize for faster processing or for slower processing but with less chance of syncing conflicts. This option is only available if the AutoSync option is set to Typical. The available choices are:
- Never just syncs the folder in due time as it would normally would be synced with the periodic syncing process. This results in the fastest processing of the email movement, but the target folder will not be trained with the new email for several hours.
- Background only syncs the target folder in the background. This also results in very fast completion of the move operation, and it usually works out that things occur in the correct order and the target folder is properly trained. Older versions of the app only ever used this option. Unfortunately, the target folder syncing can actually occur before the move is completed. This can cause some syncing conflicts as well as issues where emails are not properly marked as read after the move.
- Typical syncs the folders as the end of the move operation as part of that action, but only for accounts (like Exchange accounts) that support incremental syncing. This will keep the syncing and databases in a consistent state and the move action will be only minimally slowed down.
- Aggressive works like the 'Typical' choice above, but it does so for accounts that do not support incremental syncing, provided the additional inline syncing operation will not take a long time.
- Always works like the above 2 choices, but for all move operations. This is the safest choices in terms of syncing consistency. In most cases, only the 'perception' of the move actions time to complete will be affected.
Miscellaneous
- Audio sets the behavior of Preside when playing audio. The default is for the audio to stop playing once you've exited the screen the audio was started from. You can change this so that the audio continues until the app is stopped, or the audio can keep playing until the end. This latter choice would continue playing the audio even after the app is stopped.
- iTunes/iCloud backup can be turned off if you do not want to back up Preside. This can be useful for saving space in your iCloud account. The downside of this is that you will need to rerun the setup process if you ever reset your phone or even upgrade to a new phone. Note that this will backup Preside's settings and all data (emails and attachments).
Mark read
- When viewed tells the app to automatically mark emails as read immediately upon viewing the email details screen. Most users should leave this enabled, but users that like to leave their emails as unread, should set this to Off.
- After move tells the app to mark emails as read when they are moved or deleted. Most users should leave this enabled, but users that like to leave their emails as unread should set this to Off.
- 2 seconds after previewed tells the app to mark emails as read if they are viewed on an Inbox or Folder screen for 2 seconds or more. If you scroll quickly by them, they will not be marked read, but if you linger for a couple of seconds, they will be. This option is not generally recommended for most users.
Filing
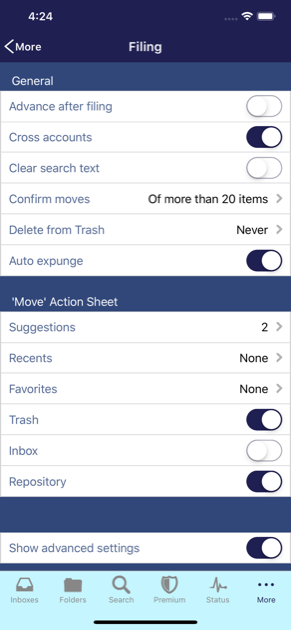
The Filing preferences screen provides settings that relate to both filing and copying. For legacy reasons, filing is also sometimes referred to as 'Moving' or 'Organizing', and, in general it is the Organize button that is used to invoke filing.
- Advance after filing causes Preside automatically advance to the next email whenever an email is filed or deleted. The email that is 'next' is determined by the parent list from which this email was navigated to. If the last email in the list is filed or deleted, emailGanizer will return to the list, itself in the same way it does every time if this preference is left off.
- Cross Accounts determines whether Preside will offer folders from other accounts when filing an email. Due to the limitations of Exchange ActiveSync, folders from those accounts will never be offered when filing an email from a different account. IMAP & Exchange EWS accounts, however, are capable of receiving uploaded emails. As such, folders from these accounts are normally offered if applicable. Disabling the Cross Accounts preference will stop that behavior, and it is a way to make sure that you don't accidentally mix emails from different accounts.
- Clear search text determines whether Preside will clear out the text in the search box after using the search functionality to file an email. It can be useful to leave this disabled to avoid retyping the same text when filing the next email, but enabling this option can save you from the need to tap on the clear button in the text field if you are filing into a different folder. Whether or not this is enabled is purely a matter of personal choice depending on your own tendencies when filing emails.
- Confirm moves sets the minimum number of emails Preside will allow you to move without providing a warning and requiring a confirmation. The motivation behind this option is to avoid a situation where 'Select all' is accidentally tapped and LOTS of emails are accidentally moved. If that happens, 'Shake-to-Undo' can be used to undo the accidental moves, but things work better if the accidental moves are avoided in the first place, and that is what this option is for.
-
Delete from Trash determines Preside will react when you attempt to delete and email or folder that is already in the Trash. The available choices are:
- Never disables deletions from the Trash entirely. With this option, the only way to delete an email or folder from the Trash is to use the 'Empty Trash' functionality.
- Emails only allows the permanent deletion of individual emails from the Trash, but it does not allow the deletion of folders, which can only be deleted with the 'Empty Trash' function.
- Folders & Emails allows the permanent deletion of both folders and emails from the Trash, but it requires that you confirm the deletions before proceeding.
- Folders & Emails (minimal confirmation) allows the permanent deletion of both folders and emails from the Trash, and there will be no confirmation when the number of emails being deleted is less than what is configured in the 'Confirm moves' option described above.
- Auto expunge tells Preside to completely remove an email from the source folder when performing moves and to immediately compact the folder. This is necessary for users of email clients, like OWA, that do not correctly hide messages marked as deleted.
'Move' Action Sheet
This is the menu that appears when you tap the Organize button to file an email or you tap the Copy button  to copy an email. Items that appear in this sheet are the most likely folders for the email being filed and the quickest way to get an email filed. These options below allow you to configure the number of each type of item that will appear in this menu.
It is also possible completely disable this menu and automatically proceed to the full filing screen (usually accessed by tapping More on the menu). To disable the 'Move Action Sheet', set each of the options to 0, None, or OFF.
- Suggestions sets the number of relevant folders to be shown in the action sheet.
- Recents is the number of recent folders to be shown in the sheet. Recent folders include folder that recently had an email filed into it, as well as recently created folders.
-
Favorites is the number of your favorite folders to be included on the sheet. These are ordered in accordance with they way they are arranged in the Favorites screen. In other words, if you choose 1 for this option, then only the top folder on that favorites screen will be included in the Move action sheet. To manage favorites and set the order of favorited folders so that your most favorite folder is on top, go to the Folders screen and tap the Favorites button
 . Then tap the Edit button and use the controls on the right to drag the folders into the correct order.
- Trash determines whether Trash choice will appear on this action sheet. If the app is configured to use a Trash button, you might want to disable this, and use the extra space for more folder suggestions or favorites. Also, if you'd prefer to just skip the action sheet and go directly to the Folder Suggestions screen, you should disable this option along with all of the other options in this section.
- Inbox can be turned on to show your Inbox for the current account whenever filing an email from a non-Inbox. This can be useful if you often move emails back from @context folders or elsewhere into your Inbox when you are ready to deal with them.
- Repository will include your the Repository folder for the current account on the sheet. This should be On to enable gmail Archive functionality.
- Show account displays the account for each folder suggestion above and to the right of the folder name. This can be very useful for users with folders in many accounts. When disabled, Preside will still attempt to uniquify the folder name by adding the account name in parenthesis next to the folder name if there is a ambiguity.
- Full path will show the entire hierarchy the folder choices if enable. If left disabled, Preside will still attempt to uniquify the options by adding as much of the path as necessary in order to make it u
- Truncation specifies how to truncate long folder names that appear on the action sheet. Usually, folder names are displayed without any sort of hierarchy or account qualifiers. If, however, that short name does not uniquely describe the folder, then qualifers are added to the name in order to make it unique. At that point, however, the folder name can get quite long, and it might not fit on the action sheet. This preference specifies how to handle that situation. If the preference is set to 'Shrink' then the font of the folder name will be reduced so that the entire folder name fits. If the preference is set to 'Beginning', the folder name will be truncated at the beginning. If the preference is set to 'Middle', the unique name will be truncated in the middle, and the name will be truncated at the end if the preference is set to 'End'. In all cases, if the name is not unique in the action sheet after the truncation, the 'Shrink' option will be used on the duplicate button in order to maintain uniqueness.
Sending
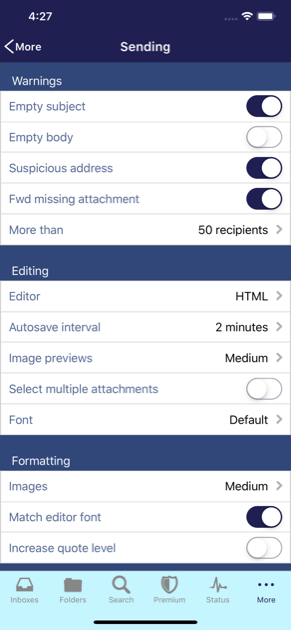 General
- Default Identity sets the identity to use for sending new emails.
- Images sets the size of images that are sent by the app.
Warnings
The app can warn you about various things you might have forgotten when sending an email. Setting any of the options below will cause an appropriate warning and require confirmation before continuing to send an email if the particular condition is met.
- Empty subject will show a warning if you've forgotten to enter a subject for your email.
- Fwd missing attachment will show a warning if you're forwarding an email with attachments, but the attachments are not included in the forwarded message. (Only attachments that have been downloaded in the original message will be forwarded.)
- Empty body will show a warning if the body of your email has been left empty.
- More than will show a warning if more than the specified number of recipients are being sent the email.
Sent mail
- Always copy to sent will make sure that sent emails get placed in the Sent folder in your account. This setting should usually be left enabled. It knows how to deal correctly with Exchange accounts and gmail accounts that copy to the sent folder automatically.
- After sending describes the actions that the app should take after sending an email. This should usually be set to None or Choose Later, but it can be set to any of the available mail actions (which are described in the next section). It should also be noted that the copying the sent email is implied here if the above 'Always copy to sent' option is On.
- Send action sheet is the action sheet that appears after you tap the Send button when sending an email if the above 'After Sending' option is set to 'Choose Later'. The choices in this configuration area allow you to set which actions should appear at that time. The available choices follow. (Please note that if the 'Alway copy to sent' option is Off, there will be an additional choice for each of the items below that includes that 'Copy to sent' action. If the 'Always copy to sent is On', that action will be peformed in addition to the selection).
- Do nothing will take no further action than sending the email.
- Archive will move the original email to the 'Repository' folder after the reply is sent
- File will file the original email after sending the reply. This will present the standard Folder Suggestions screen immediately after the email is sent and allow you to choose where to file the original email.
- File both will file both the original email and your reply after sending the reply. This will present the standard Folder Suggestions screen and file both of the emails to the same chosen location.Please note that, due to limitations with the Exchange ActiveSync protocol, this option will only work if you have an IMAP account. (We hope to find a work around for this in a future update.) Also, please note that if the 'Auto copy to sent' option is On, the composed email will remain in the Sent folder in addition to being copied to the selected folder where it is to be filed.
- Add task will present the Tasks action sheet immediately after the email is sent. That allows you to add the original email to your tasks app or account.
- Add task & file will add the original email as a task and then file it.
- File sent mail will only file the mail being sent. This option is only available if the 'Always copy to sent' option is Off and there is an IMAP account.
- File each will file the original mail and the sent email to different locations. This option is only available if the 'Always copy to sent' option is Off and there is an IMAP account.
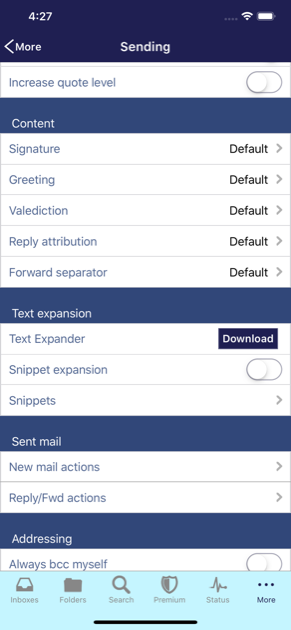 Composition
- Autosave interval sets the interval at which drafts will automatically be saved to the draft folder. If data usage is a concern, set this to a longer interval.
- Editor determines whether a text editor or an html editor will be used to compose your emails. The text editor is faster and generally works better. The html editor allows for inline images, different fonts & colors, and other text decorations.
- Image previews determines the size of inline images as they appear when composing an html email. This is not related to how the images look when being viewed by the recipient. It's purpose is to allow for easier composition where the images do not take up so much screen space. This option is only visible when HTML is selected as the Editor.
- Text expander enables TextExpander expansion if the TextExpander app is installled on the device. If that app is not installed, a download button is displayed. Tapping that button will bring you to the App Store page where TextExpander can be purchased. This is worthwhile for most people looking to optimize their productivity.
Quick parts
Quick parts are snippets of prefilled email content that are used when creating emails. Like the templates, these quick parts can either be plain text or xsl if substitutions are desired.
- Greeting is usually something that appears at the top of an email. This is also known as a salutation. The System Greeting just says "Hi" followed by the recipient's first name.
- Valediction is the closing part of the email that appears before the signature block. The System Valediction says, "Thanks," followed by your first name.
- Signature is the signature portion of an email that you are probably familiar with from other clients.
Templates
Template preferences define the way the app will initialize the body of email compositions. Templates can still be loaded on demand for any email, but these define some default templates. It is not a good idea to change these unless you know what you are doing. In most cases you can get the your emails to work as you like by modifying the 'Quickpart' substitutions described in the previous section.
- New email is the template to be used when creating a new email.
- Reply is the template to use when replying to an email. If an xsl template is used, the quoted text in the reply is inserted by means of that xsl stylesheet. To change positions or wording of the delimiter, edit the appropriate text portion of this template. If a text template or None is used, the required quoted text is inserted automatically.
- Forward is the template to use when forwarding an email. If an xsl template is used, the forwarded text is inserted using that xsl stylesheet. You can remove or reposition the signature or the introduction to the forwarded message by editing this template. If a text template or None is chosen, the required forwarded message is inserted automatically.
Accounts
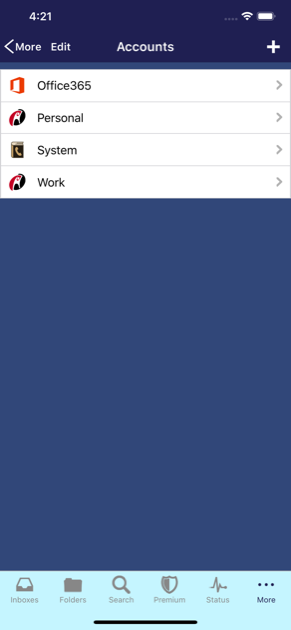
The Accounts screen shows your list of email accounts. At the top right of this screen is the Add button which can be used to add a new account. Next to that button is the Edit button button. After tapping the Edit button, the screen will enter the Edit mode where there are red circles to the left of each of the account rows. Tapping on one of those circled presents a "Delete" button which can be used to fully delete the account.
Account operations such as adding a new account or deleting an account can take a while. Often you are better off just deleting and reinstalling the app.
You can edit the settings for the existing accounts by tapping on the row displaying that account name. That will bring you to the Account Settings screen, where you can change existing account information.
Account Settings
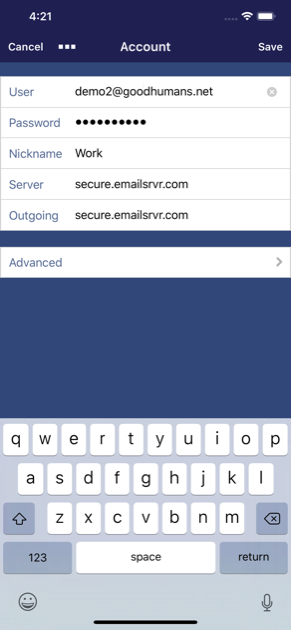
The Account Settings screen is where you can modify the account information for your email accounts. At the top right corner of this screen is the Save button  . Tap that button when you are ready to save the account information. The various settings for the accounts are described below.
- Protocol is the protocol being used for communicating with this account. This cannot be changed after the account is entered. In most cases IMAP is the best protocol. Some Exchange servers are not configured to support IMAP, in which case the Exchange ActiveSync protocol is used.
- User is your user id for the incoming mail server. This will often be the same as your email address. For Exchange accounts, you should always try logging in with your email address first. If that does not work, you can try your Exchange DOMAINuser.
- Password is your password for this incoming mail server.
- Nickname is the name that Preside will use when it refers to this account. It is unrelated to any server information. It should be short.
- Server is the fully qualified host name for your incoming mail server. It will often look something like: secure.emailsrvr.com.
- Outgoing Server is the fully qualified host name for your outgoing (SMTP) mail server. It will often look something like: smtp.gmail.com.
- Advanced provides access to the advanced settings for the account.
Advanced Account Settings

The Advanced Account Settings screen is where you can change the less common settings for your email accounts. Please note that the changes made on this screen do NOT take affect until the account is 'Saved' from the Account Settings screen. The various settings for the accounts are described below. Only those settings applicable to the current protocol setting are displayed.
Features
- Protocol is the protocol being used for communicating with this account. This cannot be changed after the account is entered. In most cases IMAP is the best protocol. Some Exchange servers are not configured to support IMAP, in which case the Exchange ActiveSync protocol is used.
- Read Emails controls whether this account will be used for emails. This should usually only be turned Off for tasks-only accounts like ToodleDo. It also can be useful to set this off for adding an Exchange account for the purposes of creating tasks, while a separate IMAP account for dealing with the emails on said Exchange server.
- Send Emails determines whether this account will be used for sending emails.
- Files determines whether this account will be used for storing files. It is only available for account types that support this functionality.
- Create tasks controls whether this account will be used for creating tasks. It is only available for accounts that support task creation.
Incoming
- Encryption states whether an encrypted session should be used for communicating with your mail server. This should almost always be set to SSL/TLS.
- Port is the port used for connecting with your incoming mail server. For IMAP accounts, this is usually 993.
- Subscribe to new folders is used for IMAP accounts. If set, Preside will automatically add any folders it creates to the account's list of subscribed folders. Preside, itself, does not make use of IMAP folder subscriptions, but some other email clients only show 'subscribed' folders. It is almost always best to leave this setting to 'On'.
- Days to sync is a only available for Exchange and Hotmail accounts. It limits the number of previous days' emails that will be downloaded for this account. Due to the particulars of the Exchange ActiveSync protocol, this is the only good way to limit the number of emails downloaded from Exchange/Hotmail accounts. The default is for Preside to automatically set this based on the content of each folder and its folder type. For any folder with a significant number of emails within the past month, only 1 month's historical emails will be synced.
- Soft deletes is a only available for Exchange and Hotmail accounts. It is also only present if the 'Days to sync' option is not set to Unlimited. This option tells Preside how to respond to so-called 'Soft delete' actions from the Exchange server. These are messages indicating which emails are older than the days to sync. If this option is enabled, Preside will remove these messages from its local store. Otherwise, Preside will retain these older messages so they can be searched, used for classifications, and otherwise acted upon.
Outgoing
- Encryption states whether an encrypted session should be used for communicating with your mail server. This should almost always be set to SSL/TLS.
- Port is the port used for connecting with your incoming mail server. For IMAP accounts, this is usually 993.
Communication
- Ignore certificate errors is used in conjunction with SSL. If set to 'On', Preside will accept certificates that are self-signed or otherwise flawed. It is often necessary to set this to 'On' using Exchange servers, which commonly use self-signed certificates.
- Client certificate assigns an SSL client certificate to use when communicating with this account.
- HTTP escaping determines how the app will escape characters when communication with servers over HTTP. Usually this should be left alone.
- Concurrent connections determines the number of connections the app will make on the server at the same time. It is usually best to leave this at the default of 4. In some cases, it can be increased to allow for faster syncing, and in some cases it can be decreased for servers that require it. Be careful decreasing this, however, because that might affect the app's ability to quickly sync your Inbox. It is usually better to slow down the app's load on the server using other options.
- Rate limiting describes the maximum rate at which the app can make requests on HTTP servers, which is relevant for any account that is not an IMAP account. This is the preferred way of slowing the app down. The higher limits for this choice border are nonsensical given the current state of iPhone and network technology. In general, to slow things down you will want to set this to 1,2,4, or 5.
- Disable fast folder check is meaningful for accounts that allow for checking of multiple folders at once for new emails. This includes Exchange Servers 2007 (SP2) and later, as well as IMAP servers that support the LIST-STATUS IMAP extension. This 'fast checking' allows the app to check many folders at the same time for new emails. It can save a lot of time in the syncing process. Disabling that check (by enabling this option) should only be done if you are experiencing problems.
- Store secrets in keychaintells the app to store your password in the iPhone's keychain utility. This provides some extra security and should generaly be left on.
Identities
- New emails is the identity to use from this account when creating new emails from this account. If the folder setting for this option is not Default that setting will be used and this one will be ignored them creating emails from that folder.
- Replies lets you choose the default identity to use when replying to emails from this account. The actual identity used can be overridden on a per-folder basis.
- Forwards is the default identity to use when forwarding emails from this account. THis can be overridden on a per-folder basis.
Identities
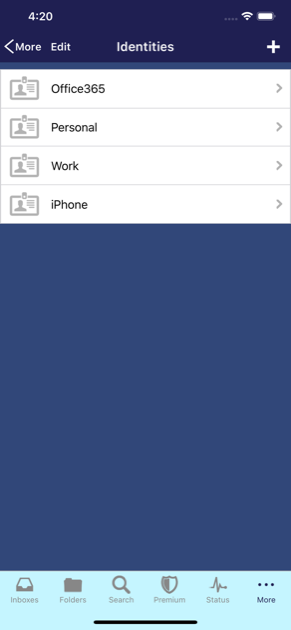
The Identities screen shows your list of email identities. These can be thought of as sending profiles. They allow for different configurations of From Name's and headers and other settings related to sending. It is safe to leave these at their defaults, but if you want specific behavior for different accounts, this is the place to do that.
At the top right of this screen is the Plus button which can be used to add a new identity. Next to that button is the Edit button . After tapping the Edit button, the screen will enter the Edit mode where there are red circles to the left of each of the account rows. Tapping on one of those circled presents a "Delete" button which can be used to fully delete the identity.
You can edit the settings for the existing identities by tapping on the row displaying that account name. That will bring you to the Identity Settings screen, where you can change existing information.
Identity Settings
The identity settings screen allows you to configure different profiles for sending email. This included different from name's and addresses, as well as different headers and other behavior.
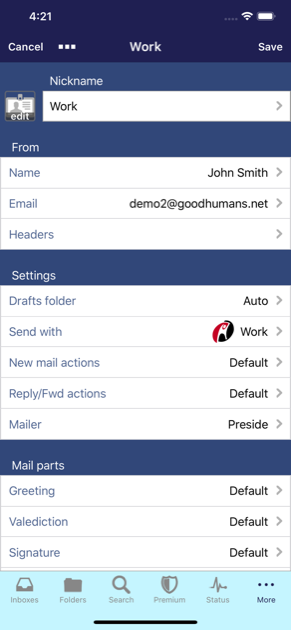 Nickname
- Nickname is the name by which the app will refer to this identity. This should be kept fairly short. The default nickname will match the name of the account.
- Photo is to the left of the nickname. Tapping on the spaceholder for that component will allow you to associate an image with the identity. This helps for differentiating between the identities. It is currently only used for display within the app, but there might be other uses in the future.
From
- Name is the name that should appear in the From header of the emails you compose. This will usually be your first and last name with proper capitalization.
- Email is the email address the mail should be sent from. With many servers, this needs to exactly match the email address for your account.
- Headers allows you to choose which headers will be visible while you compose your email from this identity. You can also edit the default values for headers where it makes sense to do so (like In-Reply-To).
Settings
- After sending describes the actions that the app should take after sending an email with this identity. If this is set to Choose Later, the Send Action sheet will be displayed if appropriate.>/li>
- Drafts folder is the Drafts folder that will be used to save drafts created by this identity. It is mostly safe to set this as None.
- Send with selects the account this identity will use for sending email. The account takes care of the various communication and actual transmission of the message.
- Mailer selects the Mailer that will be used with this identity. Usually, this should be left at 'eMaiLGanizer'. If you'd like to use the standard iPhone mail framework for this Identity, then you can choose iPhone here. The app also supports some limited integration with Zentap. If you've got that installed, you can select that as the mailer for this identity. Finally, the app can launch TextExpander if that is chosen as the mailer. Unfortunately, they do not support integration beyond a simple launch at this time.
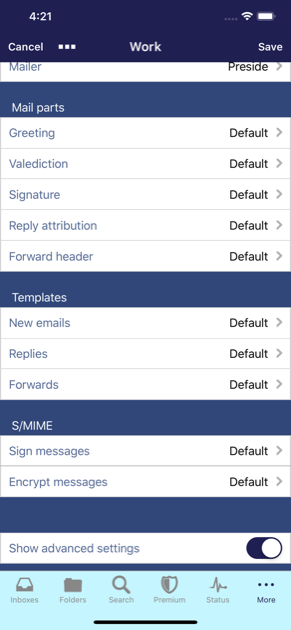 Templates
The identity templates allow you to set override the default templates with specific templates for the identity. As you may recall from a prior section, the templates describe the initial formatting of an email.
- New email is the template to be used when creating a new email.
- Reply is the template to use when replying to an email. The template is the mechanism by which the quoted text from the original email is inserted into the reply. To change positions or wording of the delimiter, edit the appropriate text portion of this template.
- Forward is the template to use when forwarding an email. The template is the mechanism by which the text from the forwarded email is inserted into the message. You can remove or reposition the signature or the introduction to the forwarded message by editing this template.
Substitutions
Substitutions are snippets of prefilled email content that can be used by templates when creating an email. Like the templates, these quick parts can either be plain text or xsl if substitutions are desired.
- Greeting is usually something that appears at the top of an email. This is also known as a salutation. The System Greeting just says "Hi" followed by the recipient's first name.
- Valediction is the closing part of the email that appears before the signature block. The System Valediction says, "Thanks," followed by your first name.
- Signature is the signature portion of an email that you are probably familiar with from other clients.
Buttons reference
Buttons are the things you tap in order to get the app to do things. They are represented as text and/or icons. Often they are static and appear at the top of the screen, but, for many screens, you can configure which buttons appear in various places in order to optimize for your own email management style. This section provides reference information about the each of the available buttons in Preside.
-
The Attach button
 attaches images and/or other documents to an email or other composition. When tapped, it will present a screen showing your files accounts, as well as a standard interface to iOS Photos and camera.
-
The Repository button
 moves emails (and/or other item) to a 'Repository' folder. That's a folder that stores otherwise unrelated emails. THe Gmail Archive and MYN 'Processed Mail' folders are examples of these. In order for this button to work, you'll first need to setup a folder with a 'Repository' Folder Type. There should generally be one of these for each account.
-
The Cancel button dismisses the current screen and goes back to the previous one. It is generally shown on screens where an item is being edited or created. When tapped, the edit will be canceled and the item will be restored to its prior state before the screen is dismissed.
-
The Clear button
 clears the values from the input fields on the visible screen. This usually sets them all to blank. This is useful, as it allows for quickly resetting the form and starting over.
-
The Compose button starts a new email. Depending on the configuration of identities for the account and if the identity to use for the new email can be determined automatically, Preside might ask you to select the identity to use for sending the email.
-
The Copy button copys an email or other item into a new folder. This works almost exactly like a move, except that the original item remains in the original folder.
-
The Defer button
 defers an email to a later date. This is done my moving the email into a 'Deferred' folder and out of the Inbox. When the defer time expirse, the email will be marked unread and moved back into the Inbox. When the Defer button is tapped, you will be presented with a list of deferral times and the option to select a specific date and time. Additionally, there is an option to configure which times appear in that menu. For this button to work properly, you should have setup at least one folder with a 'Deferred' Folder Type. In most cases, there should be one 'Deferred' folder for each account.
-
The Done button
 exits the Editing or Batch mode and returns the current screen to normal viewing mode. For some screens, the Done button is used in place of the back button. On those screens, the Done button performs the same function as the back button. It dismisses the current screen and goes back to the previous one.
-
The Edit button puts the screen into Edit mode. In that mode, you can delete and/or reorder items, depending upon what the specific screen allows. If deletes are allowed, you can delete items by tapping on the red circle that appears to the left of the item and then tapping on the red button to the right to confirm the delete. If reordering is allowed, you can reorder items in Edit mode by using the control on the right-side of the item to drag the row into place. Tap Done to exit Edit mode.
-
The Filters button
 brings you to an advanced search screen where you can setup a search based on various complex constraints. This includes the ability to search on speficic fields like the Subject, as well as the ability to search for specific Tags, recipients and more.
-
The Flag button
 flags emails (and/or other items) if they are unflagged. If the email is already flagged, this button removes the flag. When used in batch mode, the selected items will be checked for flags. If they are all in the same state, the flag will be toggled. Otherwise, Preside will ask wether to flag or unflag all of the selected items. Please note that Exchange 2003 & Hotmail accounts do not support this type of flagging when connected with the ActiveSync protocol. As such, the 'Flag' button will not appear for emails in those types of accounts.
-
The Forward button
 forwards an email. Usually this involves launching a compose screen with the various information from the selected email filled in with a forwarding format. Use the 'Forward separator' setting in Content section of the Sending preferences to configure the header at the top of the forwarded email.
-
The Favorites button shows items you have favorited. The types of items displayed is dependent on the screen you are viewing when the Favorites button is tapped. For example. tapping the button on the Folders screen will show your favorited folders.
-
The Full screen button
 is used on the iPad to enlarge the modal windows that sometimes appear in front of the main screen.
-
The Full search button
 performs a full search using the inputs on the current search screen. This differs from the currently visible results in that there will be more relevant results, but they might be slightly different. This is due to the fact that the Full search button searches for full terms, while the autocompletion results use a prefix search.
-
The HTML button shows the HTML version of an email. This is most useful when the default viewer is set to show the Text version of an email. It can also be useful to quickly show the HTML email in a fuller screen.
-
The iOS Contacts button
 opens the standard iOS interface to a specific contact. If the contact doesn't yet exist, it opens the standard iOS Contacts interface for creating new contact, with the appropriate information prefilled.
-
The Menu button presents a contextual menu of actions or other options that are relevant to the current screen. The exact options presented are dependent on the screen being viewed. In general, if you're looking to do something that you cannot find elsewhere, it's a good idea to tap on the Menu button and see what's available. Please note that the Menu button is also sometimes referred to as the Actions button.
-
The Meta actions button
 shows the meta actions that can be performed on the email. Choosing one of the meta-actions performs that meta action on the selected email. Only meta-actions that operate on the 'Original' email or 'Both' will be offered as choices.
-
The Next item button
 advances to the next item. Usually, the next item is defined by the mail list from which the email was nagivated to. For example, if that list is sorted by Sent time (latest first), the 'next' item is the item who's sent time is right before the current item.
-
The Organize button moves emails into another folder. This actions is sometimes referred to as 'Filing'. When tapped, the Organize button will present the 'Move' action sheet. That will show the most likely folders the email will be filed into. It can also be configured to show Favorited folders and Recently selected folders. The bottom option in that sheet is the 'More ...' option. Choosing that option will bring you to the Folder Suggestions screen, from which you can access all of your folders and/or search for the correct folder.
-
The PDF button
 creates a PDF version of the selected email and dislays that PDF. From there, it can be saved or shared with another app. The advantage of PDFs is that the entire email including images can be saved in a single file that is viewable anywhere. Unfortunately, non-image attachments will be removed in this format.
-
The Add button starts the process of creating a new item. When tapped, it will present a screen where you can enter values for the item's attributes. You can then save or cancel the creation of the item. The type of item added is dependent on the screen the Add button is on when tapped. If tapped on the Folders screen, it will add a new folder. If tapped on the Tasks screen, it will add a new task, and so on.
-
The Previous item button
 navigations to the previous item. Usually, the previous item is defined by the mail list from which the email was nagivated to. For example, if that list is sorted by Sent time (latest first), the 'previous' item is the item who's sent time is right after the current item.
-
The Print button
 prints the selected email or other item. It does this by formatting the item as HTML and them calling the standard print services provided by the operating system in order to do the actual printing. In most cases, that will present a screen where the printing attributes can be set and the printer can be selected.
-
The Reply button presents a menu options for sending an email. This includes the option to reply to the selected email, forward the selected email, starti a new email, reply to all recipients of the selected email and more. There is currently no way to reply directly to an email without first choosing from these various options.
-
The Reply all button
 replies to all the recipients of an email. It directly lanches the email editor with the recipients pre-filled into the appropriate recipient fields. Whether or not your own email address is includes is dependent on whether Preside recognizes an email address as your own along with the "Reply to myself" setting in the Sending preferences. Preside is able to recognize email address as your own, if they are set as the From address in one of your Identities, they are the main email address for your email account, or they have been setup as Aliases in the More > Aliases screen.
-
The Search button shows a search box. That allows you to search for items relevant to the items being displayed. For example, tapping the Search button on the Folders screen allows you to search the folder list.
-
The Settings button
 is displayed on the Dashboard screen when running Preside on an iPad. It is also displayed on various screen on the iPhone if the 'More' tab is configured not to appear. When tapped, it generally brings you to the More screen or directly to preferences and documentation.
-
The Share button
 presents a share sheet for sharing the email. That is a standard iOS control that allows you to send the email to other apps for processing and/or perform system activities on the email.
-
The Snippets button
 replaces the keyboard with a list of snippets that can be used for quick insertion of text. Snippets can be made of of place text, html or xsl. To use an html snippet, make sure to surround it with <html> and </html>.
-
The Source button
 shows the raw mime text for the email. This includes all of the headers and most everything else about the email received from your mail server. The source can then be saved or shared from the subsequent screen.
-
The Speak button
 begins speaking emails in the current list, starting with the selected email.
-
The Stash button
 dismisses the compositions screen but leaves the draft active for quick resumption. When there is an active draft, the Compose button and/or Reply button will be badges throughout the app. When those badged buttons are tapped on, you are given the option of resuming the draft or clearing it. Using the Stash button is generally much quicker than saving the email into your Drafts folder and finding it there to reedit a draft, but only 1 stashed draft is allowed at a time.
-
The Tag button
 assigns an Exchange Category or IMAP Keyword to an email. Tapping the Tag button will present a screen that shows all of the available tags. Typing into the top box will search for a particular tag. When a given tag doesn't yet exist, Preside will create it and assign it to the email in one step.
-
The Tasks button is used for adding an email as a task or calendar entry. Tapping the Tasks button presents a menu that includes all of your Tasks accounts and all of your compatible tasks, notes, and calendar apps that the email can be added to. Tapping on one of the accounts presents a data entry screen with the subject filled in as the task title and the content of the email filled in as the task's notes. For Exchanges (EWS) accounts, the full raw email will also be attached. The task can then be quickly saved directly into your tasks account. Choosing one of the apps launches the app with the appropriate values prefilled.
-
The Text button
 shows the Text version of an email. When using the HTML viewer as the default, this can be useful in seeing the text of the email without the images and/or other formatting. It also allows for sharing the email with apps that support text, but not HTML.
-
The Thread button shows the full thread/conversation for the selected email. All emails, including emails in other folders, will be displayed. The thread will be shown in a conversation like format, and buttons on that thread screen will operate on the entire thread. This allows you to move or delete the entire thread at once, among other things.
-
The Mark Read/Unread button
 changes the 'Read' status of an email. If the email is already marked as 'Read', tapping this button will mark it as 'Unread'. If the email is marked 'Unread', tapping this button will mark it as 'Read'. When processing emails in batches, Preside will check the current status of the selected messages. If they are all Read or Unread, Preside will toggle them. If the selected emails contain a mix of Read and Unread messages, Preside will ask you for guidance.
-
The Trash button
 moves emails into the Trash folder for the account. In the unlikely case a Trash folder doesn't exist for the account, another account's Trash folder. All moves, including moves to the Trash can be undone by shaking your device.
Advanced Tools
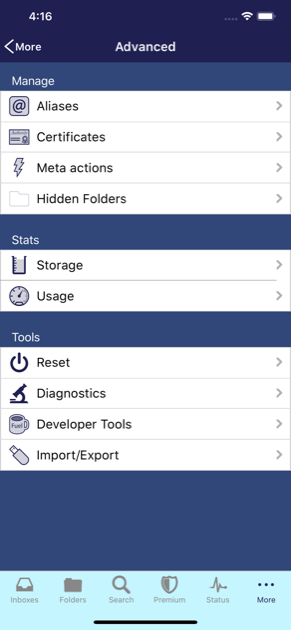
The Advanced Tools screen allows you to reset some of the data that Preside has accumulated. A description of each resettable item follows.
Tools
- Storage will bring you to a screen that shows how much space the app is using on your device and some other interesting information.
- Aliases brings you to a screen that allows you to inform the app of the various emails addresses that should be treated as your own. It is important to add these in order that the 'Reply all' function and the thread view work properly.
- Certificates allows you to manage both server and client SSL certificates into the app.
- Hidden Folders shows the folders that have been hidden from the other screens. The app hides some folders automatically and others can be hidden from the Folder Settings screen. To unhide a folder, navigate to the hidden folders and change its type and Save.
- Mail headers presents a screen where you can manage the default mail headers to be used when composing emails. This allows you to set whether a header will be visible on the Compose screen and it also allows you provide prefilled values for some headers.
- Mail actions shows you the meta actions that can be taken on emails.
Reset
- Clear Attachment Cache will delete all of the attachments that Preside has downloaded.
- Search History will clear all of the items that appear in your search history when using the email Search tab.
- Clear Classification Cache will remove of the classifications for emails in your inboxes. These will not be classified again until the email is viewed. This will also clear all of the items from the Quick File screen.
- Clear Folder Statuses will clear the synchronization status from all of the folders. This in turn will cause a re-check of each folder for new, old, or modified messages.
- Reset message confirmation will cause any messages that you've indicate not to show again to once again be shown.
Troubleshooting
- Diagnostics presents a screen that allows you to perform some troubleshooting on the app. That screen is where you can enable and managing logging.
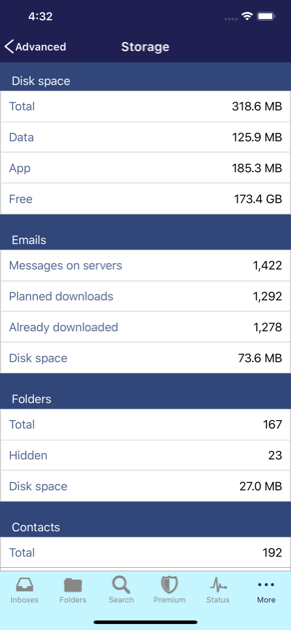
Storage
The Storage screen shows you how much disk space the app is using and what the space is being used for. This is interesting information that can also be used in troubleshooting.
Please note that it can take a while to determine this information, so please be patient while Preside performs this function.
Disk space
- Total space used is the total disk space used by the app.
- Attachments is the space that is used for storing explicitly downloaded attachments. This space can be freed by using the 'Clear Attachment Cache' option on the Advanced tools screen.
- Free is the amount of free disk space on your device. There needs to be some disk space for the app to run properly. It is unknown what this exact number is, but you should probably keep at least 20MB free at all times.
Emails
- Messages on servers is the total number of emails on the servers of all of your email accounts.
- Planned downloads is the number of emails that the app plans retain on your device given your current settings.
- Already downloaded is the number of emails that have already been downloaded to your device. This can sometimes be larger than the 'Planned downloads' due to deletes and other factors.
Folders
- Total is the total number of folders in all of your email accounts.
- Hidden is the number of folders that are hidden within the app. These folders can be viewed from the 'Hidden Folders' option on the Advanced tools screen.
Email Aliases
The Email Aliases screen is where you can manage your email aliases. These are alternate addresses at which you receive email. Generally, these might be different versions of your name that you have aliased to one of your accounts. Preside uses this information for a variety of functions including filtering of your own addresses when creating replies as well has help in identifying which messages are yours when displaying conversation view. Future versions of Preside might also make use of your aliases when performing classifications.
Certificates
The Certificates screen is where you can manage your client authentication certificates as well as your root certificates. This is useful when communicating with Exchange servers that use self-signed SSL certificates or requires SSL client authentication. To add certificates to Preside you need to use iTunes file sharing. That is accomplished by using the USB connector to connect your device to your computer. Then run iTunes and click on your device. Then click on the Apps tab, scroll down to the File Sharing area and click on Preside. Then click the 'Add...' button, and select the certificates you would like to add to Preside.
Preside will only recognize file in 'der' or 'pks12'format and the extension on the file must be "der","cer", or "p12".
The main part of the Certificates screen lists the certificates that have already been imported into Preside. These can be removed from Preside by using the Edit button at the top right, or by using a swipe gesture across the item. In either case tapping on the Delete button finalized the delete.
To import new certificates into Preside, tap on the Add button second from the right at the top of this screen. That will bring you to the Add Certificate screen.
Import Certificate
The Import Certificate screen is used for importing certificates into Preside. Once imported, these certificates can be used for client authentication or to recognize servers that use self-signed certificates.
The top field in this screen is the file name of the certificate to be added. If there is only one certificate available, this will be defaulted to that file. If there is more than one file, this row can be tapped on to select from the list of the certificate files available for importing. Preside can will only recognize files in der or pks12 format, and the extension on the file must be "der","cer", or "p12".
If the certificate file being imported is in PKCS12 format, a password field will be presented. Enter the password for the certificate into that field.
Once the file and the password, have been entered, tap Save button . This will import the certificate into Preside, and it will also delete the file.
Compose
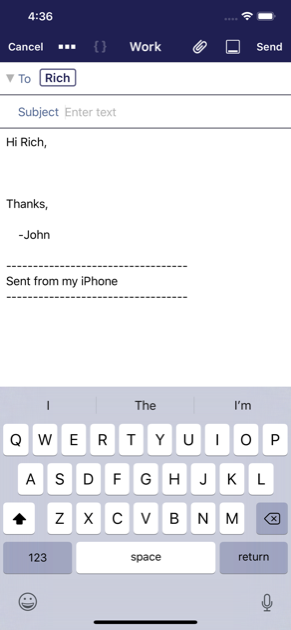
The Compose screen is where you compose emails. It operates on the flipside of the app and its navigation is external to the tabs described at the top of this document. You are returned to the main email navigation after you send your email or the screen is dismissed for some other reason.
Navigation Bar
- - The Cancel Button cancels the composition and returns you to the main email viewing navigation. Before exiting, however, it will give you the option of either Saving or Deleting the draft.
- - The Actions Button presents a menu of options for modifying the composition. The available options are:
- Show Cc & Bcc will cause those headers to be shown on the screen. You can tap on them to begin entering recipients of the email
- Load Identity will present a list of identities that you can send the email from. This is how you change the 'sender' of this emails.
- Load Tempate presents you with the standard content selection screen that allows you to select a template to be loaded. Loading the template will replace the body of the email with the content of the template.
- More brings you to the Compose Settings screen where you can modify other properties of this email. Those properties include the visible headers, the Drafts folder, and some other settings for the composition.
- - The Stash Button allows you the stash the draft aside for later editing, while you return to the email viewing portion of the app. This is useful if you want to go back and read through some more of the email thread, or look at some other related emails. Once a draft has been stashed, all of the compose buttons in the app will show a badge
 indicating there is a stashed draft. Tapping on that button allows you to resume the draft, clear the stashed draft, or start a new draft.
  - The Send Button sends the email. If configured to do so, it will also show the Send Action Sheet that allows you to choose actions to perform after the email is sent. When those are complete, this screen will exit and you will be returned to the main email navigation.
Headers
The headers section is the area where you can enter the recipients and subject for your email. Other headers that are configured to be 'Visible' in the preferences or the settings for this email will also be displayed in this section. When entering email addresses, the app will present email addresses from your contacts and email history as autocompletions. Tapping on the row with the email address will insert the entry into the header and allow for more typing.
You can delete an entry from a recipient list by using the backspace key to clear it like you would any other character. You can also use the Select & Cut functionality that is standard to text fields.
To the left of the top header is an Expand/Collapse arrow that can be used to shrink this portion of the email to a minimum size and create more room for the composition. For replies, which have the subject & header filled in, the composition will start with the headers collapsed. You can change these headers by tapping on the Expand/Collapse arrow.
Body
The body section the part of the screen where you compose the body of your email. To add an attachment, perform a long-tap in this area. That will present the pasteboard menu with an 'Attach' option at the right. Tapping on the 'Attach' button will present the content choose that will allow you to add an attachment.
URL Schemes
Preside supports several URL schemes in order to provide the ability to view and send emails from other apps. Some of these schemes are redundant due to their evolution over time, as well as a need to provide app specific schemes for standard URL scheme that might lead to a different app. The preside: schemes are the preferred interface where redundant schemes exist.
preside://
This scheme opens the app to wherever it was when it was last exited. It works the same way as tapping on the icon on the iPhone springboard screen.
preside://view
This scheme opens the app to a specific email. The email to open is described by form variables described below.
Form variables:
- mid is the message ID of the email, as specified in the Message-ID email header. These message-IDs are not 100% unique, but they generally represent a single email. If you copy an email to another folder, though, it will have the same message ID as the original. Also, the same email sent to different recipients will have the same message ID As such, if you want to open the email within a specific account and folder, you can use the variables described in the preside://folder scheme. Like any other value that might contain unsafe characters, remember to escape the value using percent encodings.
- mid64 works the same as the mid variable above, but it specifies the message ID using a 64bit crc. This is the crc64 variant with Jones coefficients. You can find code for this hash at: https://github.com/PeterScott/rdbparser/blob/master/crc64.c and elsewhere on the web. Use of this variable can shorten URLs, but it's only useful if you're generating URLs programatically.
- feid is the internal ID of the email within a specific folder. These internal IDs are not permanent. They can change when folders are reset and in some other cases. They are also not generally accessible to users. As such, these are only really used in URLs generated by Preside, and their purpose is an optimization.
Examples:
- preside://view/mid=%3CFBAF5389-9ADC-4920-BA16-EEDECAEA2FDF%40mac.com%3E
- preside://view?feid=513788&mid64=59155a24e1e5c0b
preside://folder
This scheme opens the app to a specific folder or Inbox,
Form variables:
- fpth is the URL encoded path to the folder that begins with the Path Prefix for the account and separates the components of the path using the account's designated hierarchy character. For Office, Outlook, Exchange and other accounts that don't use a hierarchy character, please use %1F to separate components.
- aname is the nickname of an account within Preside that contains the folder you'd like to open. You can find an account's nickname from the More > Accounts screen and elsewhere within the app, as it is the main mechanism Preside uses to refer to accounts in the interface.
- aid is the internal ID of a specific account in Preside. These internal IDs persist unless you delete the account, but they are not consistent between devices. As such, these are only really used in URLs generated by Preside, and their purpose is an optimization.
- fid is the internal ID of the folder within a specific account. These internal IDs are not permanent. They can change when folders are reset and in some other cases. They are also not generally accessible to users. As such, these are only really used in URLs generated by Preside, and its purpose is an optimization.
Examples:
- preside://folder?fpth=INBOX&aname=Personal
- preside://folder?fpth=INBOX.Entertainment.Sports.Baseball&aname=Personal
- preside://folder?fpth=Reference%1FFinance%1FBanking&aname=Office365
preside-mailto:
This scheme allows for the sending of emails. Usually, it opens to to compose screen with values from the URL pre-filled into the appropriate fields, but it can also be used to automatically send without any user interaction. The format of the URL is compatible with the standard 'mailto' URL, as defined in RFC 2368, but this scheme add some options on top of those. Also, Preside's scheme does not offer support for inclusion of arbitrary headers. Please note that all of the form variables are optional.
Form variables:
- to is a comma separated list of 'To' recipients to the email. These can be listed as email addresses or as the name and email addresses as defined in RFC822. Like all other parameters, the values should be encoded with URL percent encodings. 'To' recipients can also be specified as the first part of the URL after the ':' and before the '?', in the same way standard mailto URLs are formatted.
- cc is a comma separated list of the recipients to be Cc'd on the email. Recipients can be specificed as simple email addresess or as canonical email addresses as defined int RFC822.
- bcc is a comma separated list of the recipients to be Bcc'd on the email. Recipients can be specificed as simple email addresess or as canonical email addresses as defined int RFC822.
- subject is the subject of the email. Remember to URL encode the value with percent encodings.
- body is the body of the email. If the value begins with <html>, the text will be treated as HTML. Otherwise, the text is considered to be plain text.
- htmlBody can be used to specify an HTML body to the email in addition to, or in place of the text body.
- from is an email address that helps Preside determine which account to send the email from. If specified, Preside will send the email using the identity whose 'from' address matches the given email address. I
- senderIdentityName is the name of the identity to use for sending the email. If specified, this has precedence over the 'from' variable. If neither variable is included, and more than one account is configured to send emails, the app will use the default identity configured in the app or prompt for the sending identity when the URL is opened.
- prompt determines whether or not Preside will open a compose window or send the email without any user interaction. User prompt=0 for the latter behavior or use another value or leave out entirely in order to require user interaction before sending the email.
- x-success specifies a URL for Preside to open after it has sent the email. This is only considered if the 'prompt' variable is set to '0'.
- block determines where Preside should wait until sending has been completed before opening the URL indicated by the 'x-success' variable. Use 'block=0' to open leave Preside immediately after the email is queued. Use another value or leave out to have Preside wait until the email has been sent before going back to the given URL.
Examples:
- preside-mailto:none%40none.com
- preside-mailto::none%40none.com?subject=Test+email+subject&from=none%40icloud.com&bcc=info%40none.com
- preside-mailto:bogus@example.com?subject=test%20subject&body=This%20is%20the%20body%20of%20this%20message."
- preside-mailto:info@preside.io?subject=test%20subject&body=This%20is%20the%20body%20of%20this%20message.&prompt=0&x-success=https%3A%2F%2Fpreside.io&from=none@icloud.com"
Disclaimers
Preside is provided 'AS IS' without warranty of any kind, either expressed or implied, including, but not limited to, the implied warranties of merchantability and fitness for a particular purpose.